Showing posts with label crafting. Show all posts

Creating Sand Art with KidsBeeHappy

Last month Maddi who sells fab Sand Art kits from KidsBeeHappy on her Facebook page sent Little A a sand art kit. We have used these before and had such a lot of fun we both jumped at the chance to have another go. When he opened the packet he was so pleased to see a fun snake to colour in with the different colours of sand; needless to say, when we did eventually get around to doing this craft he didn't waste any time!


He let his sister Midge and I help him too, we all had fun choosing which part of the snake would be what colour. They even came up with the idea of pouring the sand out together and mixing it up using the small yellow tool that came with the pack. This resulted in some lovely colours blending together, they were rather pleased with themselves!


I'd highly recommend this craft. It's simple, easy and as long as you have a spot to tap off the excess sand it isn't really a messy activity plus anyone can do it! Fun for all ages! I've been told to buy some in the very near future, I think we'll be choosing one each!

Sand Art packs priced from £4.00 including VAT

Introducing the Money Saving Epson ET-4550 Printer

I have always been a printer hogger at home. I used to get moaned at for using up all the paper when I was growing up, printing posters for my bedroom wall, song lyrics and of course all my coursework. When Midge was born I used my printers for all her photos instead of using online sites, but then cartridges got more and more expensive and then I moved out and never managed to afford a new printer so back I went to the library and begging parents to print things out for school route. 


Now things have changed! I have been sent this amazing printer, the Epson ET-4550. It is an Eco Tank printer, ink cartridges have been replaced with ink filters which can last up to 2 years saving you money in the long run. Already a win for me. This printer can print up to 11000 pages in black and white or colour and delivers your print outs fast.

When I received the ET-4550 I was surprised by how lightweight it was despite its size. I popped it on my craft drawers next to several sockets and started the set up! This printer is also a copier, fax and has a scanner too. It came with magenta, black, blue and yellow ink bottles which is where I started. 


I was worried I would need a super steady hand but filling the ink tank was really easy. First open the ink bottle and remove the foil cover, then pop the lid back on tightly. I'd recommend doing those 2 steps then snipping the top off of the ink lid to avoid any mess. The ink tank is clearly labelled so you don't have to worry about filling the wrong ink tank up with one of the other colours. There is a clearly marked line to indicate where your ink should fill up to and then you can replace the rubber stoppers before closing the lid to the tank. What I also found great about the ink bottles was the drip flow, this minimised spillages. Any ink I did spill was a very, very tiny amount and cleaned up easily straight away. 


I then plugged the printer in and set up the space around me to continue the set up process. You can set up your fax function around this point too but I haven't done this yet purely because I have no idea who I would fax! For a working office or someone who does use fax I'm sure you'd have no trouble setting it up because the instructions are very straight forward.

Once set up I loaded my paper into the bottom tray for printing. We also tried the scanner at this point and it was really great quality. Following the instructions on the printers screen I was easily able to connect to my wifi and select layouts, paper size, quantities etc The longest part of this set up is allowing the ink tank to fill up which takes 20 minutes , I was just impatient to get started, it's really not that long to wait! 


The ET-4550 is WiFi connected, some laptops will recognise your printer straight away using the wireless detection and some can download the software using the disk provided with the information booklets.I don't have a CD Drive on my laptop so I searched the Epson link provided in the booklet and found the download process straightforward. I actually downloaded the software as I was waiting for the ink tank to fill so this helped waste some time!

I wasted no time in printing out some documents, coupons and also photos which was the one thing I really wanted to try. Printing was surprisingly quick and every image and document was clear. I am really pleased.

As I read through the booklet I decided to try connecting the Epson ET-4550 printer to my phone. I downloaded the Epson app using the app store on my phone, (this is free), and as long as your phone has no trouble finding your printer you're well away. If you have a little trouble you can find your printers I.P address which came up on my screen during the downloading process on my laptop which helps your phone find the connection. I printed a photo and several coupons from my bedroom (2 floors up!) with zero problems. The paper tray caught the print outs so they were not on my floor when I came down, the connection didn't have any trouble considering I was pretty far from my front room and again, print quality couldn't be faulted!


I have been blown away by this printer. It's the first printer we have owned in years. I know the ink will last a very long time because we don't print a huge amount. I'm pleased I can now print coupons for my shopping, the children can print out school work and I don't have to pay the library for their printing and scanning services (or ask my Dad repeatedly if he has remembered to print something important that I need!) I also have to add that I like that this printer is environmentally friendly. Not many people discard cartridges properly but now cartridges aren't a problem and I know my local recycling center take the plastic ink bottles, I can pop them out for collection and this is a plus to me.

The Epson ET-4550 has an RRP of £369.99 and comes with a 3 year warranty on the Epson site. I think it is absolutely worth the money. In the long run this printer will save you money on cartridges that in my experience don't last very long and these days even come with price tags as high as £20! What do you think? Would this printer save you money?

Cupcake Mumma

Weekend Box Club Review!


I've wanted to try a craft box out for ages, I have used one before but I couldn't commit to the payments which I'm hoping will be easier this time around because the boxes don't cost as much! I'm reviewing a new Mini Weekend Box costing just £4.95 (plus free delivery) from The Weekend Box Club, a great company getting children (and their parents and carers in most cases!) involved in more green craft, baking, exploring and one on one time.

The first thing we loved was the box itself. With all the colour and the animals printed on the front, both children knew the box was just for them and became very excited to open it! I like the fact the box just slips through the letterbox, I don't have to worry about being in for its arrival and disappointing the children if I happen to miss it.

There are two different crafts in the box, one is a make and one is a gardening craft. Ideal, one each. There is a theme to each box sent out, this one was a rainforest theme so we had a parrot mask to make which Midge claimed and some seeds to grow, which is right up Little A's street. You can subscribe to the bumper weekend boxes if you fancy more crafts and have more time. 


First the parrot, I think you'll agree Midge did a great job on her mask. Everything was supplied and Midge needed very little help from me.


Next the planting! The only extra we needed was an empty plastic bottle that Midge fetched from the recycling bag. Working together we cut the bottle in half then added our soil into the bottom. After following the instructions, we put our seeds into the soil and placed the bottle on our kitchen windowsill. I will be putting our plants' journey on my Instagram so do follow me for our rainforest update!


If you'd like to try out a weekend craft box then all you have to do is register your details at https://www.weekendboxclub.com and don't forget this code: which will give you your first Weekend Box FREE! Midge has cut out the tickets that came in the box to give to her friends, what a lovely idea.

I hope you have as much fun as we did and if you subscribe let me know, I plan to subscribe and will be sharing our makes, bakes and fun on Instagram and Twitter!


Cupcake Mumma

An Orb Factory Art Mosaic Review!

In the Cupcake House we love a craft (well, nearly of us, Mr B is the odd one out..his loss!) Midge and Little A were so excited when they got home from school and found their Orb Factory craft boxes waiting for them. Little A received a pirate box and Midge a princess themed box. Both boxes are sticky mosaic craft sets! No glue, no mess, just coloured sticky tabs that match the squares to the characters.

Pirate Sticky Mosaic Set

Sticky Mosaic Princess Set

In our kits we had 4 characters ready to decorate, a great selection of coloured square tabs which are plain and glittery (also gems in the princess set), an instruction sheet which helps you match the colours to the numbers on the characters and some stick on plastic type hooks plus several cardboard stands so you can hang two up on a wall and another two can sit proudly on a desk or shelf.

Pirate characters

Dark coloured sticky tabs

Princess characters
Selection of gems and brightly coloured sticky tabs

Midge is just the right age for these craft sets from Orb Factory, she enjoyed taking the time to place the right squares and gems on the right colour square and sharing with me what she thought she'd name the pictures and how much fun she was having. In contrast there was Little A who at 4 is a little young (although some children his age have great fun in matching up colours!) Little A was more happy to dot the squares where he felt they should go and who am I to stop him? As you can see below I did help him (by his request) and I had great fun! It was nice not to lay out newspaper, get glue all over our fingers and have lots of tidying up to do when finished.

Finished pirate character

I love the pink princess one and the woodland princess

Midges favourite character

Bright and woodland themed

I can really recommend these Sticky Mosaic sets (buy them here for £9.99) and I also like the look of Orb factory's other craft sets too so I think they're worth a look. If you purchase these sets i'd love to know what you think! 

We received the Sticky Mosaic sets for free in return for an honest review. All words and photos are as usual my own.

Cupcake Mumma

Koalapak The Craft Box for Children!


Koalapak recently contacted me to ask if we wanted to review one of their craft boxes for children. I've looked at a few boxes and can honestly say none of them interested me as much as this box (which I'm seriously considering subscribing to after seeing what great value you get from the box)

The children received their box (The Mega Box) in good time and it was even personalised with both their names printed on the front. I thought this was a lovely touch! The boxes start from as little as £3.95 up to £16.95 you can subscribe monthly or buy one off boxes, plus add extras for siblings when buying a smaller box.


In our box we received:
Easy to read and follow instructions for each craft
A cardboard frame
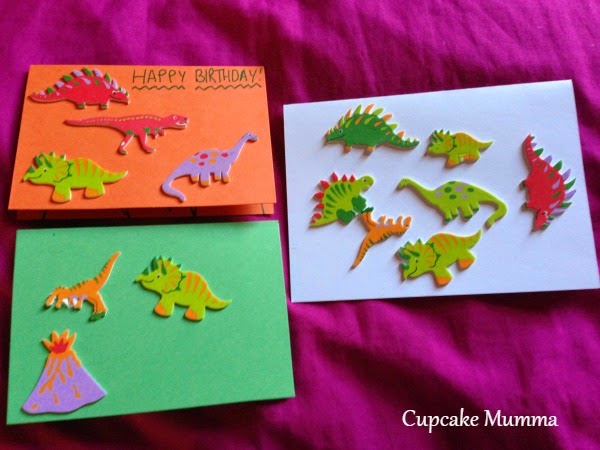
Lots of cards, pre-folded, plus their envelopes
Crayola Felt tip pens
Dinosaur and heart stickers
Button embellishments
A small Pot each of glue and glycerin
Packing tape
Paintbrush and glue spatula
Sticky tabs
Red ribbon
Heart confetti
2 pots for a snow globe craft
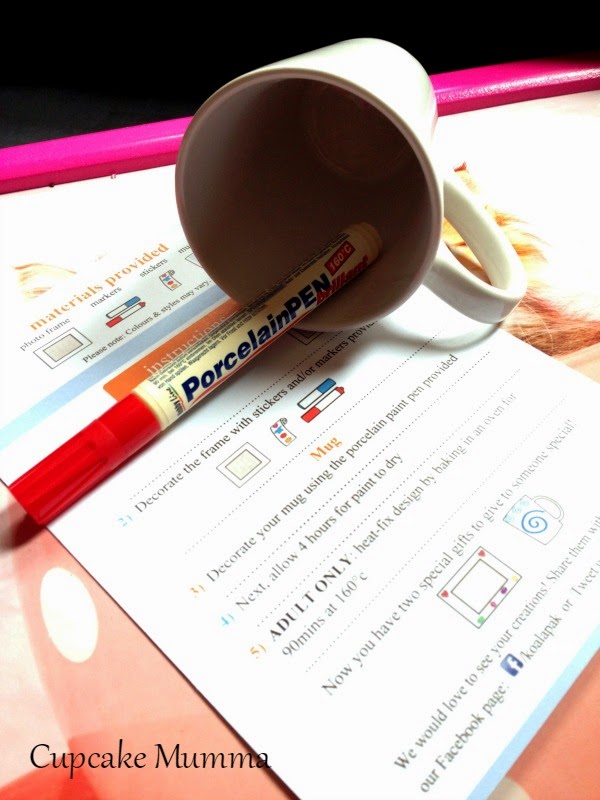
Porcelain paint pen
1 Plain mug
Gem stickers

As you can see SO much.

Midge started with the frame which she made me as an early Mothers Day gift:


Both needed my help with the snow globe craft which we all found fun. Little A picked up a photo of Midge for his and Midge drew herself a picture which I then covered with the tape provided to make sure it was water proof. We stuck the photos to the lid (I taped them in the end!) added water, glycerin and the confetti (Midge put glitter in hers from my craft draw) and they both loved the outcome.


Whilst Midge was at school Little A made some cards for an upcoming birthday, Midge made hers when she came home. Such a straight forward task meant that there was very little involvement from me at all.


I think our favourite one was the mug which Little A and I did together when he was feeling brighter after several days of croup. He drew some spiders on his mug (I had to draw something first so he got the idea) he then went and drew on a plain pink mug I own such was his fondness for this craft!! We baked the mug at 90 degrees for an hour and it's fab! I'm going to buy a plain mug for Midge because she missed out on this craft.


From a parents point of view, I loved the excitement my children got from this craft box. I loved that they created projects that I've never thought of showing them before. What I also loved was the inclusion of an information sheet detailing what skills my children would be learning and developing according to the EYFS framework. This really pleased me and I found it interesting, Ive never really thought about all the skills children pick up from crafting!

To sum up, I really, genuinely feel this is a fantastic, great value craft box for children (and heck, the whole family if your children are young enough to need your help!) Crafting is so much fun that I think it's fantastic companies like Koalapak are putting these boxes together with easy, fun projects that come with everything you need to complete.

Cupcake Mumma

Googly Eye Craft for The Crafting Prompt

I've already posted this week about both weeks 2&3 of Let Them be Small's new crafting prompt link up. I've been very slow blogging after I've crafted but so much has been going on here! Today though I settled down with Little A before nursry for a super quick craft.

If you pop down to The Works they have some plain white puppets just waiting to be decorated! I also purchased some funky googly eyes with eyelashes on as something a bit more fun. We sat down with the eyes, the puppets some stickers and a marker pen.

I don't have any photos of Little A and his puppet because it seems my phone has deleted them *sad face* but here's a photo of the one he helped me do so at least you can see something!


Monster stickers for noses and buttons..

Cupcake Mumma

Craft Prompt Week 1

Let Them Be Small

I've decided to join Let them be smalls' new link up every month where I'll be sharing a craft I create either by myself or with the children based on the weekly prompts shown below:

let them be small crafting prompts

For week 1, the prompt is ribbon. I was going to make a ribbon wand with the children but neither of them seemed very interested as they tired and what with going back to school this week, I thought I'd have some me time and make a little something for my home.

I popped to The Works and found some pretty ribbon, birds and a wooden heart. I tied the ribbon around the heart, replaced the boring rope hanging with matching ribbon and placed the birds along the top. The birds have been super glued to the wood to ensure they stay on and i'm really happy with the results of this very simple craft.


Let me know what you think and if you've joined in too leave me your link!

Cupcake Mumma

Homemade Lanterns

I've never made homemade lanterns before so thought I'd give it a try with the little ones! It was a rather spontaneous decision to make these, so I'm not going to say I'm absolutely right in the materials I've used, but we used what we could find and we had fun!
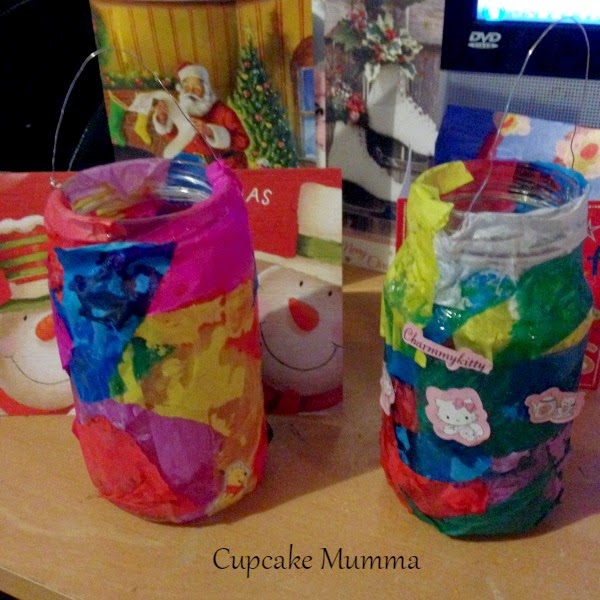
I recently acquired a craft box full of fantastic bits and bobs. We dug through it to find all the tissue paper i'd stuffed in a pouch and we selected our favourite colours, which we then set about tearing small pieces from until we had a little pile sat on our table. I popped some PVA glue in an old Haribo container so there was no squabbling over it. The previous night I had washed and removed the stickers from 2 old jam jars so we were ready to go! ( I actually wound some gold jewelry wire around the neck of the jars before the children set about decorating them)

drying before adding the candles

Midge and Little A (with my help- because I couldn't resist!) stuck the tissue paper randomly to their jars and then covered the paper with more PVA so the paper wouldn't rip and come off the jar. It all dried pretty quickly and they stuck some stickers on their jars so they could tell whose was whose. We waited until outside had gotten a bit darker and dull, then we drew the curtains and switched the lights in the playroom off. I was so pleased with the results!

Midges lantern


A quick photo before heading to the playroom!

They work! Naturally not a very clear photo in that light, but you get the idea!

 I had so much fun doing this craft with the little ones and I can't wait to make it again the future, they are both up for it. Why not give it a go yourselves? Perhaps a nice craft to see the New Year in? Speaking of crafts, i'm going to be joining in with Let Them Be Small over 2015 with The Crafting Prompt, a crafting challenge for you and the little ones. Here's the first 4 weeks of crafts. Do visit Sarah's blog to find out more!


Cupcake Mumma